The Tevo Tarantula is a popular and affordable 3D printer, and one of the best ways to enhance its capabilities is by upgrading its firmware to Marlin. Marlin firmware offers significant improvements over the stock firmware, unlocking advanced features and allowing for greater control over your 3D printing process. This guide will walk you through the process of installing and configuring Marlin on your Tevo Tarantula, ensuring you get the most out of your printer. Get ready to experience a new level of precision and customization in your 3D printing endeavors!
Why Use Marlin Firmware for Your Tevo Tarantula
Switching to Marlin firmware for your Tevo Tarantula is a game-changer. The benefits extend far beyond just having a different interface. Marlin provides a robust and highly customizable platform, giving you granular control over every aspect of your prints. From fine-tuning settings to adding advanced features, Marlin opens up a world of possibilities that are simply not available with the original firmware. This section will explain the key advantages of making the switch to Marlin, allowing you to make an informed decision and fully understand the value it brings to your 3D printing experience.
Benefits of Marlin Firmware
Improved Print Quality

One of the most noticeable improvements with Marlin is enhanced print quality. Advanced features like linear advance and improved motion planning algorithms help to reduce imperfections such as ringing and ghosting. These features allow the printer to move more precisely, resulting in cleaner lines, smoother surfaces, and overall superior print fidelity. The ability to precisely control acceleration and jerk settings further contributes to this improvement. This translates directly into better-looking prints and a more satisfying 3D printing experience. The results are prints that require less post-processing and showcase intricate details more effectively.
Customization Options
Marlin offers extensive customization options that put you in complete control of your printer’s behavior. You can adjust almost every setting, from temperature control and acceleration limits to the specific movements of the print head. This level of customization allows you to optimize your printer for different materials and specific print jobs, ensuring the best possible results every time. You are no longer limited by the constraints of the original firmware. The ability to tweak these settings enables you to fine-tune your printer to match your exact needs and preferences, ultimately leading to improved print outcomes.
Community Support
Marlin has a massive and active community of users and developers, which means you have access to a wealth of information, support, and resources. If you encounter any issues or have questions, you can easily find answers through online forums, tutorials, and documentation. This extensive support network ensures that you are not alone in your 3D printing journey. The collaborative nature of the community also means that Marlin is constantly evolving and improving. New features are added regularly, and existing features are refined. This constant development cycle ensures that Marlin remains at the forefront of 3D printer firmware technology.
Preparing for Marlin Firmware Installation

Before you begin the Marlin firmware installation, it’s essential to prepare your Tevo Tarantula to ensure a smooth and successful process. Proper preparation includes gathering the necessary hardware and software, downloading the correct firmware files, and backing up your existing settings. Taking these preliminary steps will save you time and prevent potential issues during the installation. This section will guide you through the essential preparations needed to get your Tevo Tarantula ready for its Marlin upgrade. Proper preparation ensures that the installation process goes smoothly.
Required Hardware and Software
To install Marlin on your Tevo Tarantula, you’ll need a few essential items. First, you’ll need a computer with the Arduino IDE installed. This software is used to upload the firmware to your printer’s control board. Make sure you have the latest version of the Arduino IDE and that it is correctly configured. You’ll also need a USB cable to connect your printer to the computer. Lastly, you may need the drivers for your printer’s control board. These drivers enable your computer to communicate with the printer. Make sure all software is downloaded and installed correctly.
Downloading Marlin Firmware
The next step is to download the Marlin firmware itself. The latest stable version of Marlin can be found on the official Marlin Firmware website or GitHub repository. It’s essential to download the correct version, ensuring compatibility with your Tevo Tarantula’s hardware. There are often pre-configured versions available for the Tevo Tarantula, which can save you time and effort in the configuration phase. If a pre-configured version isn’t available, don’t worry you can customize it. Download the appropriate firmware for your printer and extract the files to a location on your computer where you can easily access them. This crucial step sets the stage for the subsequent steps.
Configuring Marlin for Your Tevo Tarantula
Configuring the Marlin firmware is a critical step that involves customizing the firmware settings to match the specific hardware of your Tevo Tarantula. This ensures proper functionality and performance. The configuration process involves modifying the configuration.h and configuration_adv.h files within the Marlin source code. These files contain all the settings related to your printer’s hardware, from the type of board and the thermistor type to the steps per millimeter and the endstop configuration. This section will detail how to configure these settings for your Tevo Tarantula. Properly configuring the firmware is vital for its correct operation.
Configuring the Board and Printer Settings
Open the configuration.h file in the Arduino IDE. The first step is to specify your printer’s board type, which is usually the Melzi board. You’ll need to uncomment the correct #define for your board. Next, you’ll configure the thermistor settings for your hotend and heated bed. Make sure to select the correct thermistor type based on the specifications of your components. Also, configure the steps per millimeter for your X, Y, and Z axes and the extruder. These values are crucial for accurate movement and proper printing. Finally, configure the display settings, such as the LCD type and the language, to match your printer. This step ensures that the firmware is compatible with your hardware.
Setting Up the Z-Axis and Bed Leveling
Proper Z-axis and bed leveling setup are essential for successful prints. In the configuration.h file, you’ll need to configure the Z-axis endstop. This determines the position of the nozzle relative to the bed. You might also want to enable features like bilinear bed leveling, depending on the hardware of your Tevo Tarantula. If you’re using an auto-bed leveling sensor, configure the sensor type and offset. This ensures that the printer can automatically compensate for any bed imperfections. Correctly setting up the Z-axis and bed leveling parameters significantly improves your print quality and adhesion. This is one of the most important steps.
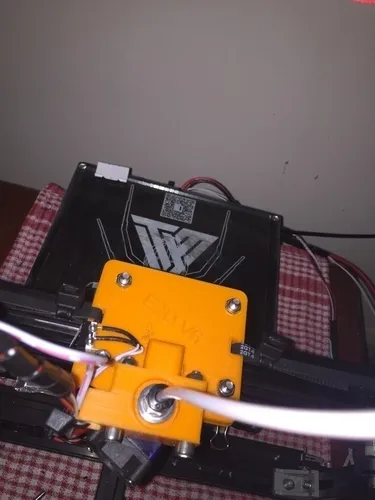
Flashing Marlin Firmware to Your Tevo Tarantula

Once you’ve configured the Marlin firmware, the next step is to flash it to your Tevo Tarantula. This process involves uploading the compiled firmware code to your printer’s control board. This is done through the Arduino IDE, using a USB connection. Proper flashing requires a stable connection and the correct settings. The following steps provide clear instructions on how to flash your newly configured Marlin firmware to your Tevo Tarantula, readying it for its first test print. Make sure to follow all steps carefully, so the process runs smoothly.
Connecting Your Printer to Your Computer
Before flashing the firmware, connect your Tevo Tarantula to your computer using a USB cable. Make sure the printer is powered on. Open the Arduino IDE and select the correct board and port from the ‘Tools’ menu. The board should correspond to the one in your printer, typically a Melzi board. The port refers to the COM port assigned to your printer when you connect it to your computer. You can usually find this information in your device manager. Once you’ve selected the correct board and port, you are ready to upload the firmware. Correct connectivity is the foundation for the whole process.
Using Arduino IDE to Flash Firmware
In the Arduino IDE, select the ‘Upload’ button. This will compile the firmware and upload it to your printer’s control board. During the upload process, you’ll see progress information in the IDE’s output window. If the upload is successful, you’ll see a ‘Done uploading’ message. If you encounter any errors, make sure you have the correct board and port selected, and that the drivers for your printer are installed correctly. In case of any errors, try restarting the Arduino IDE, and verify that the printer is properly connected. If problems continue, consult the Marlin documentation or seek help from the community. After a successful upload, your Tevo Tarantula will be running Marlin firmware.
Troubleshooting Common Issues

During the Marlin installation, you may encounter some common issues. These can range from connectivity problems to printing errors. This section provides solutions to some of the most frequent problems faced by users when installing and using Marlin firmware. Knowing how to troubleshoot these issues will save you time and frustration, ensuring you can quickly get your printer up and running. Let’s look at some of the problems, along with their solutions, to help you handle potential problems.
Connectivity Problems
Connectivity problems often prevent you from flashing the firmware. If the Arduino IDE cannot detect your printer, check the USB cable and make sure it’s securely connected. Verify that the printer is powered on and that the correct COM port is selected in the Arduino IDE. Ensure the drivers for the printer are installed correctly on your computer. Sometimes, a simple restart of your computer and printer can solve the issue. If problems persist, try a different USB cable or a different USB port on your computer. Checking these basic elements often helps to identify and resolve connectivity issues.
Printing Issues
After successfully flashing Marlin, you may encounter printing issues, such as the printer not heating up, the bed not leveling, or the extruder not working correctly. Ensure that you’ve correctly configured the thermistor settings and PID tuning in the firmware. Double-check that the endstops are correctly configured and that the bed leveling is calibrated properly. If the extruder isn’t extruding, check that the filament is loaded correctly and that the extruder motor is functioning. Often, a simple adjustment of settings in the firmware or a calibration step can resolve these printing problems. When printing issues occur, make sure you run through basic checks.
Fine-Tuning and Calibration

After flashing Marlin, the final step is to fine-tune your printer and perform essential calibrations. Proper calibration ensures that your printer operates with the highest possible precision and print quality. This section describes the key calibration steps, including bed leveling, extruder calibration, and PID tuning. Correctly calibrating your printer is critical to achieving optimal printing results and a better overall printing experience. These steps will guide you in making these adjustments to get the best performance from your Tevo Tarantula with Marlin.
Bed Leveling Calibration
Bed leveling is a fundamental step in 3D printing. With Marlin, you can use either manual or automatic bed leveling methods. For manual leveling, use the leveling screws on your bed to adjust the height of the bed at various points. For automatic bed leveling, use the auto-bed leveling feature to measure the bed’s surface and compensate for any imperfections. It is crucial to perform bed leveling before each print to ensure the first layer adheres correctly. Getting this step right ensures that your prints stick to the bed and do not curl up during the print. Properly calibrated bed leveling is a cornerstone of successful 3D printing.
Extruder Calibration
Calibrating the extruder ensures that the printer extrudes the correct amount of filament. Measure the amount of filament your extruder pushes through in a set amount of time. If it’s not extruding the exact amount, you may need to adjust the e-steps value in the firmware. To calibrate, heat your nozzle to printing temperature, mark the filament at a certain point, extrude a known length of filament, then measure the actual length extruded. Adjust the e-steps value based on your findings. Proper extruder calibration will lead to more accurate and consistent prints. This step contributes directly to the quality of your prints.
PID Tuning
PID tuning optimizes the temperature control of your hotend and heated bed. PID (Proportional, Integral, Derivative) control is a method used to accurately maintain temperatures. You can run an auto-tune process through Marlin, which automatically determines the optimal PID values. During the auto-tune process, the printer will heat up and cool down to determine the correct settings. Once completed, save the new PID values to your firmware. Fine-tuning the PID values leads to more stable temperature control, minimizing temperature fluctuations and ensuring consistent layer adhesion. This is an essential calibration step for obtaining consistent print quality.
Advanced Marlin Features
Marlin offers many advanced features that significantly enhance your 3D printing capabilities. Implementing these features can further improve your print quality, convenience, and safety. These advanced features include auto bed leveling, filament runout sensors, and more. This section will explore some of the most useful advanced features that you can implement to take your 3D printing to the next level. Activating these features will truly elevate the 3D printing experience.
Enabling Auto Bed Leveling
Auto Bed Leveling (ABL) is a popular Marlin feature that automatically measures and compensates for bed imperfections. If your Tevo Tarantula is equipped with an ABL sensor (e.g., a BLTouch or inductive sensor), you can enable this feature by configuring it in the firmware and connecting the sensor to your printer’s control board. Once enabled, the printer will automatically level the bed before each print, making leveling easier and ensuring the first layer adheres correctly. This feature greatly simplifies the printing process and improves print success rates, especially for large prints where bed variations can be more pronounced. Using an ABL sensor will eliminate the need to manually level your bed.
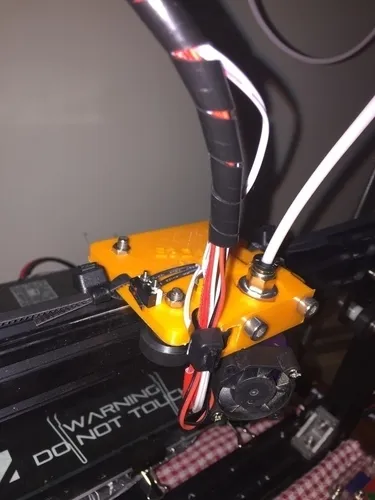
Implementing Filament Runout Sensor
A filament runout sensor detects when your printer is running out of filament, pausing the print to allow you to replace the spool. This feature helps prevent failed prints due to a lack of filament. Implementing this feature involves connecting a runout sensor to your printer’s control board and configuring it in the firmware. When the sensor detects that the filament has run out, the printer will pause the print, allowing you to swap the spool and resume the print where it left off. This functionality significantly reduces wasted prints and saves you from unexpected print failures. It adds a layer of security, especially for long prints where you might not be around. This improves the overall user experience.
Upgrading your Tevo Tarantula with Marlin firmware is an excellent way to unlock the full potential of your printer. Following the steps outlined in this guide, you can install and configure Marlin to enhance your print quality, add advanced features, and customize your printing experience. With the power of Marlin, you’ll be able to take your 3D printing to the next level. Enjoy exploring the possibilities that Marlin opens up. Have fun printing!